
We may get a small commission if you buy something through a link in our posts.
Last updated: May 26, 2021
If you have affiliate links in your website, such as Amazon Associates product links, you are legally required to disclose that to your readers.
In this article I am going to explain how you can easily add a disclosure statement at the top of your blog posts in your WordPress blog in 3 simple steps.
Set it up once, and you never have to worry about it again.
Why Do You Need an Affiliate Disclosure?
But first, let’s deal with the legal bits and pieces.
Federal Trade Commission
The FTC (Federal Trade Commission) protects consumers and competition by preventing anti-competitive, deceptive, and unfair business practices.
For us website owners, this means we need to disclose sponsored content, including innocent affiliate links, clearly and conspicuously.
It doesn’t matter where you live. If you receive website traffic from the US, you have an obligation to disclose your affiliate and sponsored links.
You can read FTC’s guidelines here.
Amazon Associates
If you’re an Amazon Associate, you also have an obligation to disclose your relationship with Amazon to your readers.
According to their Operating Agreement, you need to add the following words somewhere on your website:
“As an Amazon Associate I earn from qualifying purchases.”
I am not in a position to advise you where to place that Amazon statement. Some say it’s ok to place it in the footer, others say you need to place it at the top of each article that has affiliate links.
The below steps explain how you can add an affiliate disclosure to your blog posts. The wordings of that statement, and whether you want to include the Amazon words, is of course totally up to you.
How to Add an Affiliate Disclosure to Blog Posts
There are various ways to add any type of statement at the top of blog posts.
One of the easiest and cleanest ways of doing this is by adding a small code change to the functions.php file in your WordPress blog.
However, editing this file is rather tricky because it’s a super important file in your WordPress setup. If there are any errors, your site won’t load.
For that reason, I prefer to use a plugin called Code Snippets. This plugin lets you add code changes to your WordPress blog without having to edit the Functions PHP file.
The benefit of this is that the Functions PHP file remains untouched, and you can manage all custom code changes in one place.
Step 1: Install the Code Snippets Plugin
In your WordPress dashboard, navigate to the Plugins section. Choose Add New and search for Code Snippets. Install and activate that plugin:
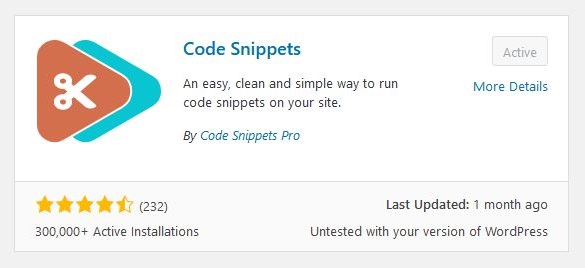
In case you’re worried about installing another plugin, Code Snippets is a super lightweight, highly reliable plugin that actually adds value.
Step 2: Implement Code to Add an Affiliate Disclosure
Navigate to the plugin and choose Add New snippet. In the editor box, add PHP code as per the following image:
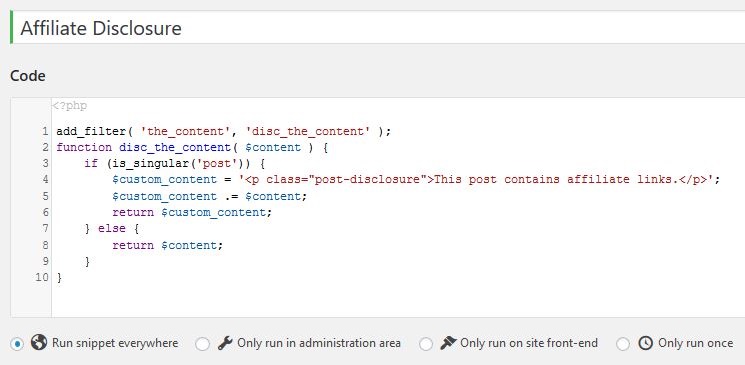
This is the copy/paste version of the code:
add_filter( 'the_content', 'disc_the_content' );
function disc_the_content( $content ) {
  if (is_singular('post')) {
    $custom_content = '<p class="post-disclosure">This post contains...</p>';
    $custom_content .= $content;
    return $custom_content;
  } else {
    return $content;
  }
}
Step 3: Activate the Code Snippet
Once you’ve created the code snippet and everything looks good, with no syntax errors, give it an appropriate name, such as “Affiliate Disclosure”.
Then click Save Changes and Activate.

Now go to any blog post and check that the affiliate disclosure is clearly visible:

The disclosure is now located above the main content.
Optional: Add CSS Code to Make the Disclosure Look Pretty
You can customize the way your affiliate disclosure looks, to make it stand out, or to make it look less intrusive.
There are various ways to add custom CSS code in your WordPress blog, but the easiest way is inside the Customizer which you can find via Customize, Additional CSS.
Here is a bit of CSS code that writes the above disclosure statement in italic and in a font-size that is smaller than the regular font-size of your content.
Note that I use the “post-disclosure” class, which you can find in the code snippet above, to apply the CSS code to the actual affiliate disclosure statement:
.post-disclosure {
  font-size: 0.8em;
  font-style: italic;
}
Of course, you’re free to adjust the above CSS code to whatever works for your site.
And that’s a wrap. FTC happy, your readers happy, you happy, everyone wins. 🙂
JOIN BLOG PIONEER
Subscribe now and receive tips and thoughts on blogging, SEO, and WordPress straight to your mailbox.


Hey AJ,
Do you maybe know if this works also for pages?
Do I need to change the code?
Kind Regards
Hi Thomas,
Yes I think so, if you change the is_singular function to receive the ‘page’ parameter.
I haven’t tried that myself, but it should work.
AJ, do you know a way to have this code appear further down in the content, as opposed to the top?
Not sure… Maybe try Ad Inserter, which gives you a bit more flexibility around placements.